Quick start (with call invitation)
You can refer to this document to understand the effects of the offline call invitation (system-calling UI) and complete the basic integration.
Tips
1. If your project needs Firebase integration or customization of features like ringtone and UI, complete the basic integration first and then refer to calling config and invitation config for further configuration.
-
Offline call invitation configuration is complex. If you only require online call invitations, please skip the steps related to firebase console and apple certificate.
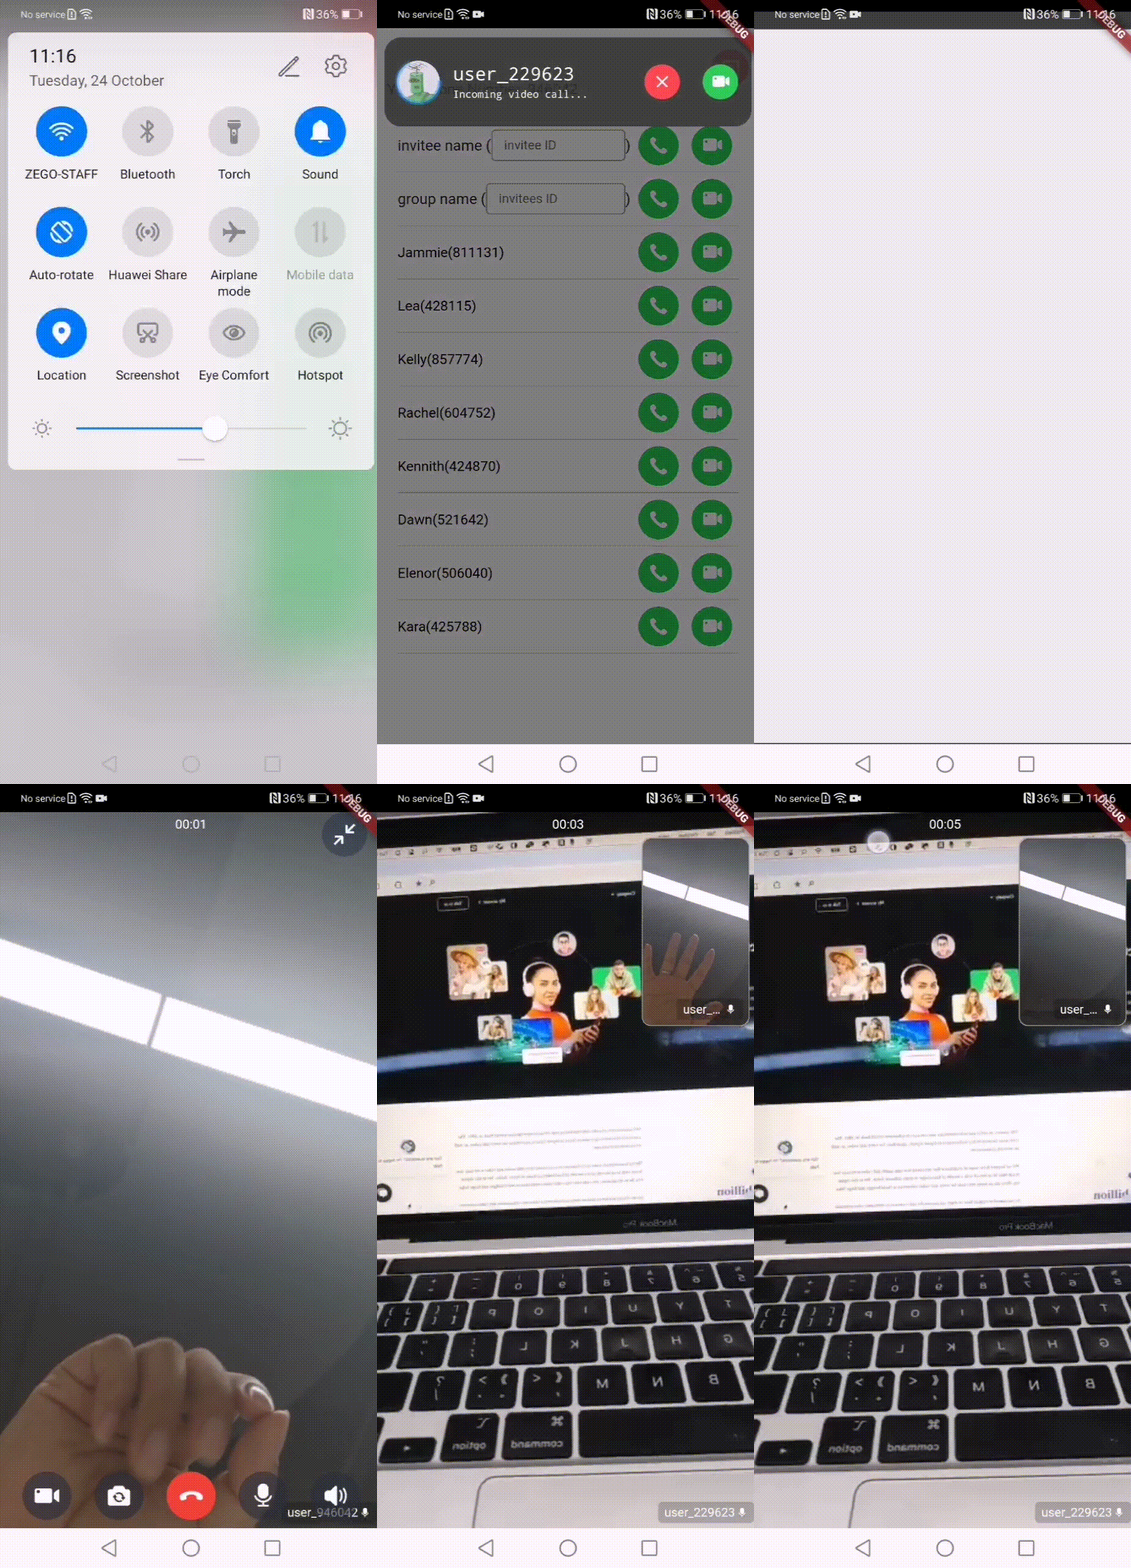
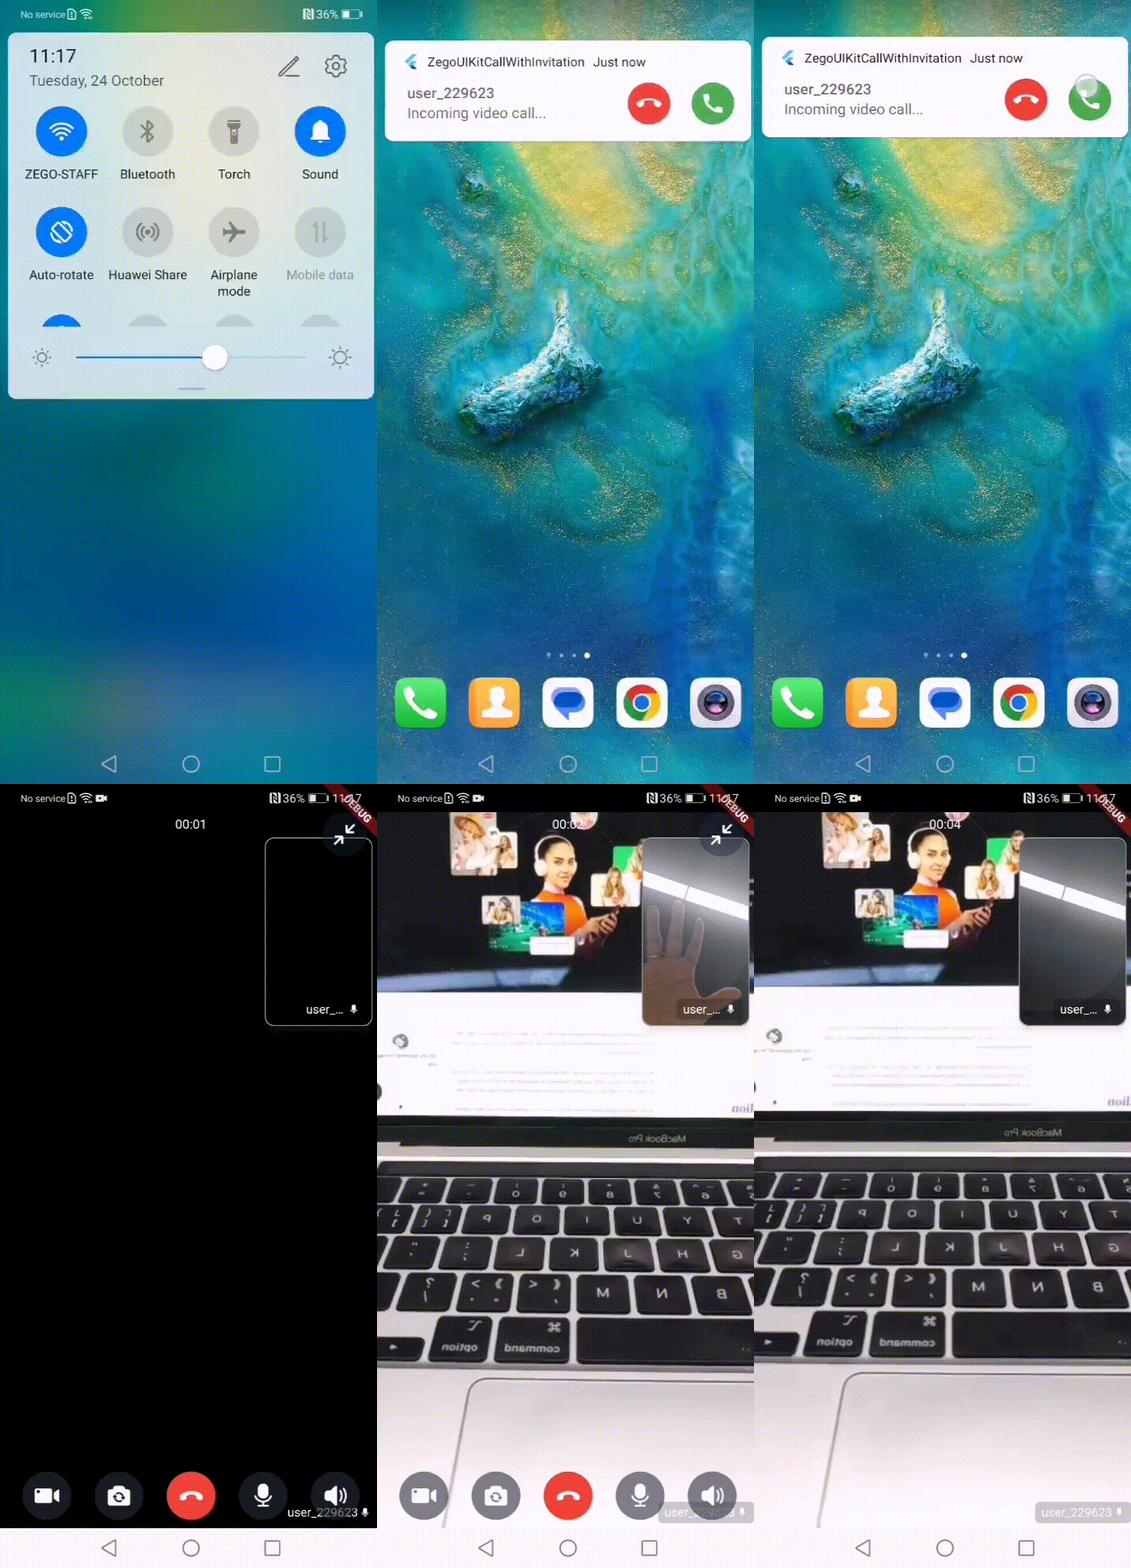
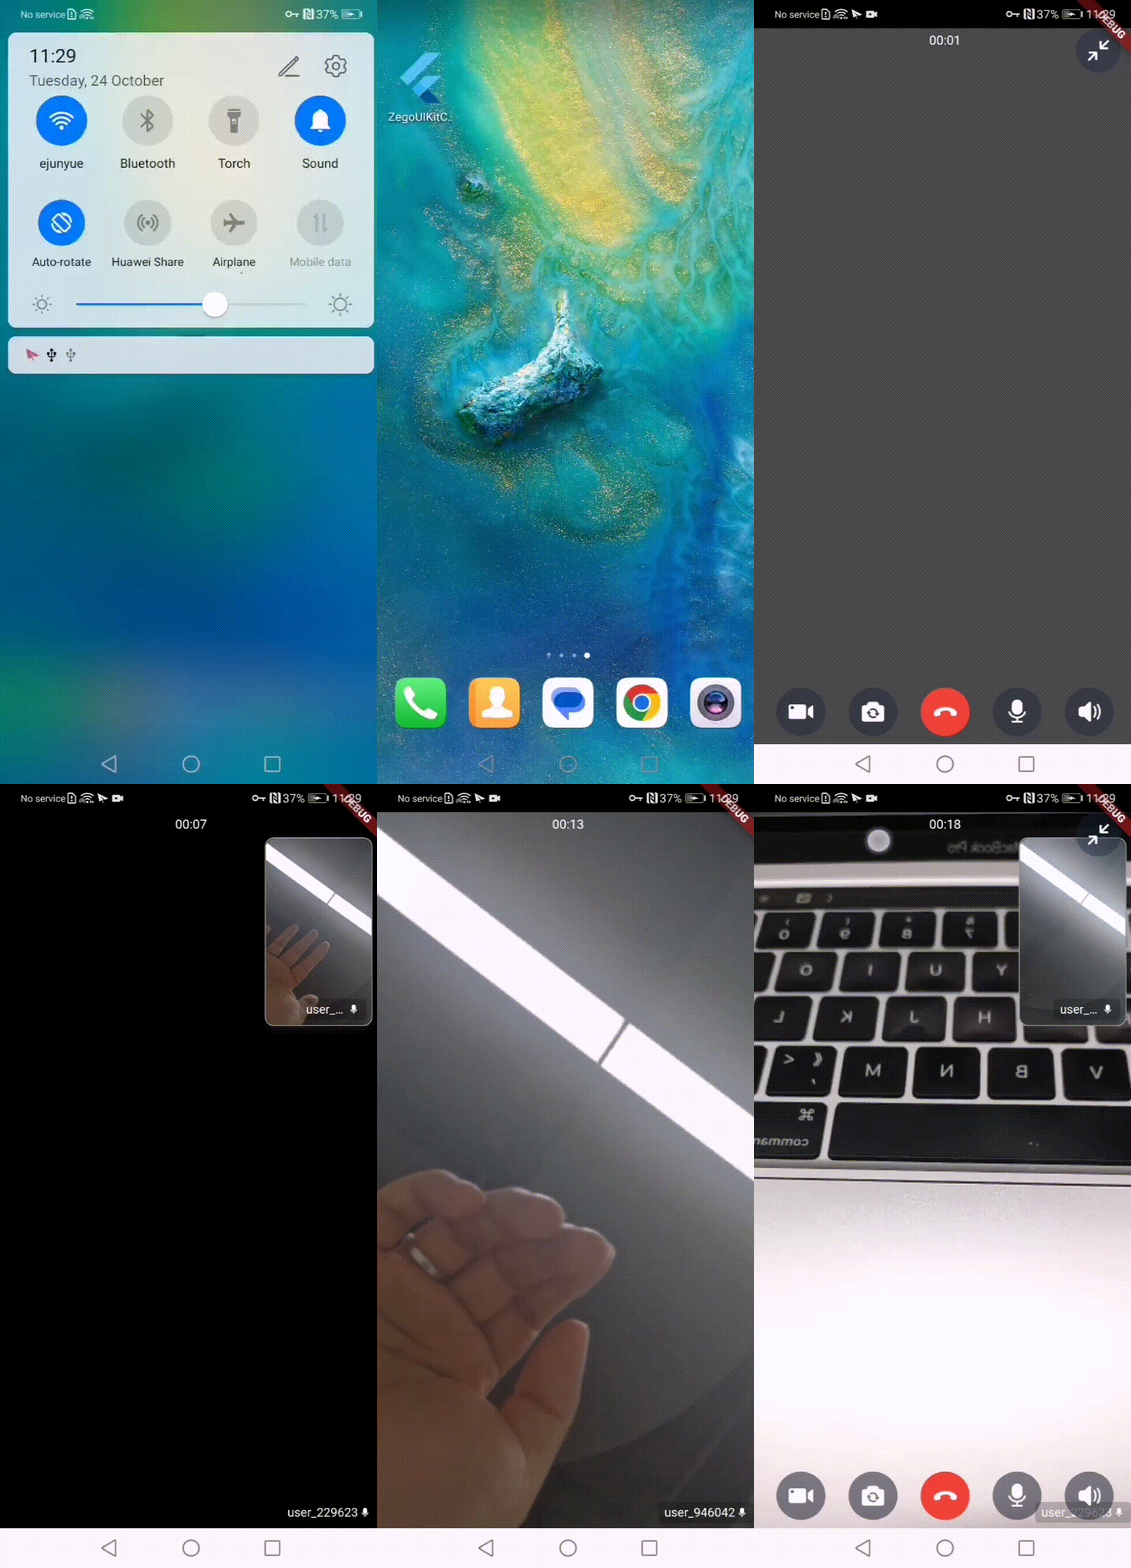
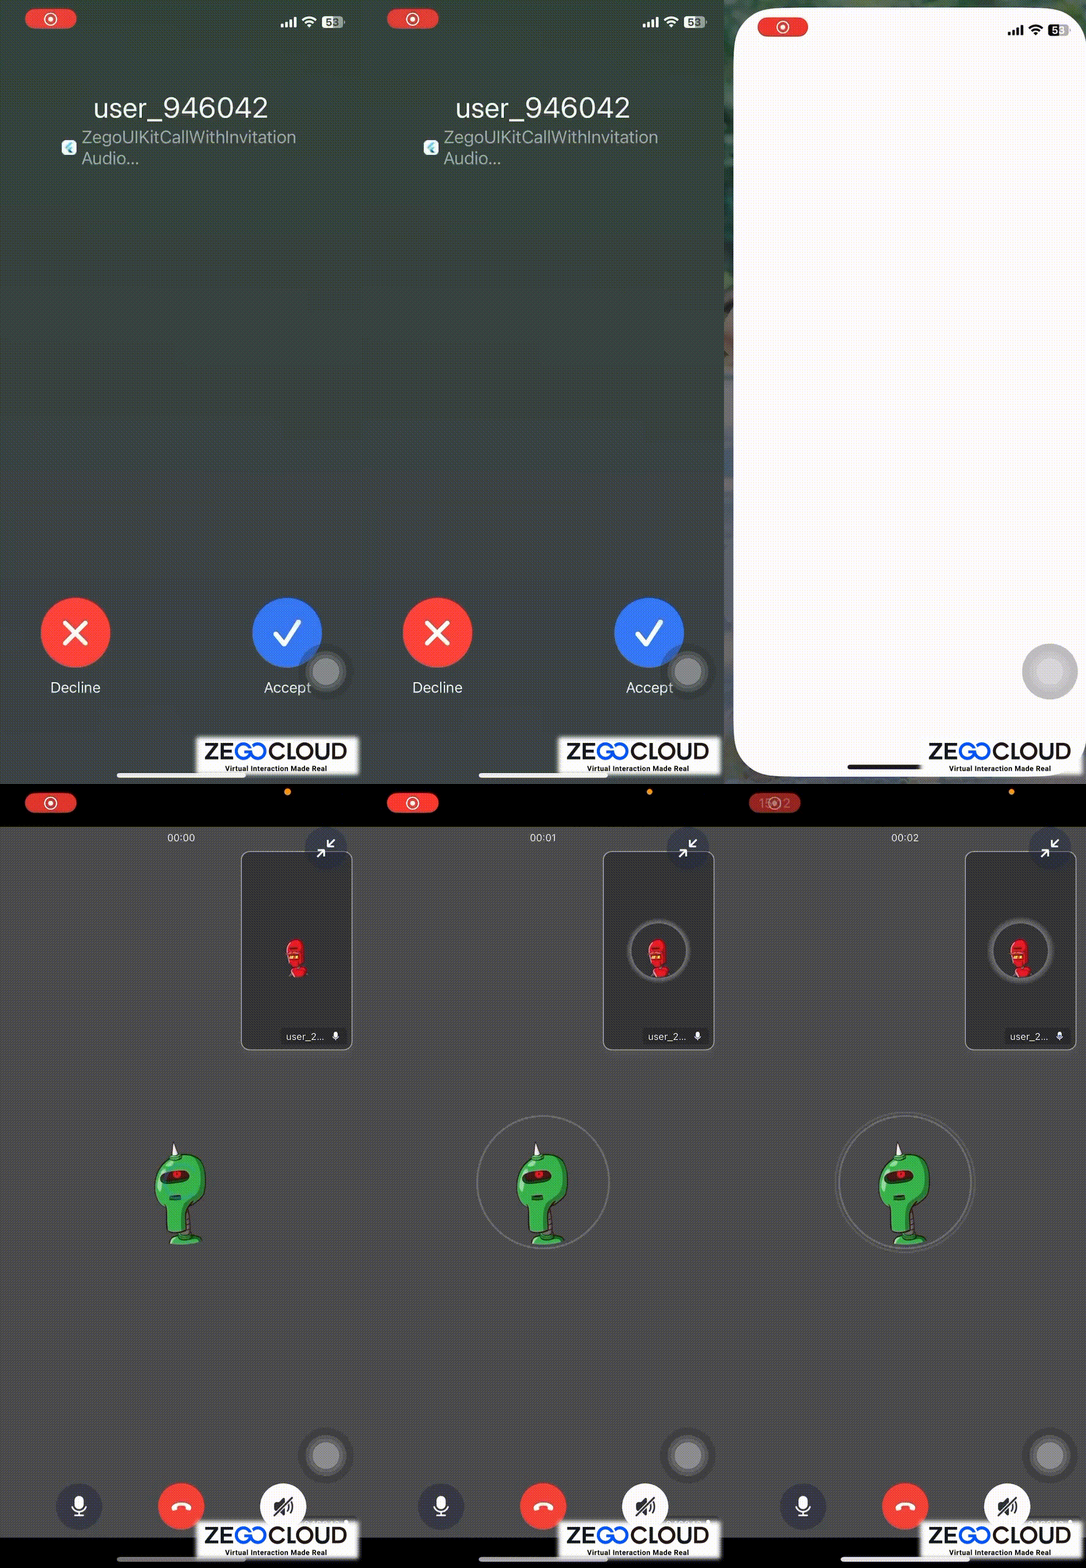
UI Implementation Effects
Recorded on Xiaomi and iPhone, the outcome may differ on different devices.
Online call | online call (Android App background) | offline call (Android App killed) | offline call (iOS Background/Killed) |
|---|---|---|---|
 |  |  |  |
Integration Guide for Common Components
It is recommended that you start by completing the integration of the common parts, and then proceed with the configuration for Android and iOS in sequence. After successfully setting up the first platform, you can begin configuring the second platform.
Prerequisites
-
Get the AppID and AppSign of the project.
-
Download Sample code here.
If you don't know how to create a project and obtain an app ID, please refer to this guide.
Add ZegoUIKitPrebuiltCall as a dependency
-
Run the following code in your project root directory:
-
Run the following code in your project root directory to install all dependencies.
Import the SDK
Now in your Dart code, import the prebuilt Call Kit SDK.
Initialize the call invitation service
To receive the call invites from others and let the calling notification show on the top bar when receiving it, you will need to initialize the call invitation service (ZegoUIKitPrebuiltCallInvitationService) first.
-
1.1 Set up the
navigatorkey.To make the UI show when receiving a call invite, you will need to set the
navigatorkey. To do so, do the following steps:-
1.1.1 Define a
navigatorkey. -
1.1.2 Set the
navigatorKeytoZegoUIKitPrebuiltCallInvitationService. -
1.1.3 Register the
navigatorKeytoMaterialApp.(If you are using GoRouter, you need to register thenavigatorKeytoGoRouter.)
-
-
1.2 call the
useSystemCallingUImethod in themain.dartfile.
-
1.3 Initialize/Deinitialize the call invitation service.
Warning
1. After the user logs in, it is necessary to Initialize the ZegoUIKitPrebuiltCallInvitationService to ensure that it is initialized, every time the application starts, whether the user logs in automatically or manually, it is necessary to ensure that init is called.
2.When the user logs out, it is important to perform Deinitialize to clear the previous login records, preventing any impact on the next login.
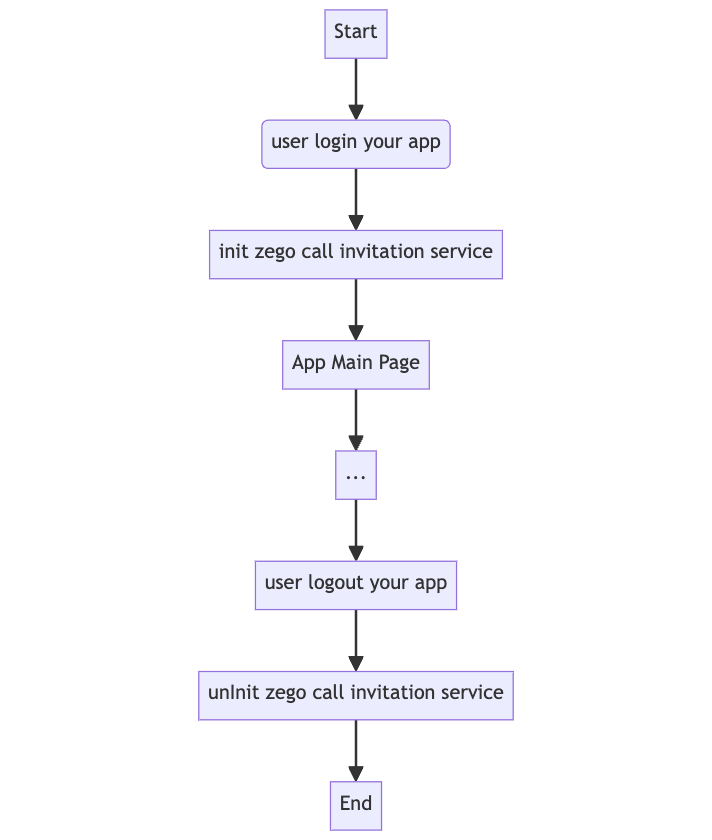
The parameters of the ZegoUIKitPrebuiltCallInvitationService().init
Property
Type
Description
appID
int
The App ID you get from ZEGOCLOUD Admin Console.
appSign
String
The App Sign you get from ZEGOCLOUD Admin Console.
userID
String
userIDcan be something like a phone number or the user ID on your own user system. userID can only contain numbers, letters, and underlines (_), with a maximum length of 32 bytes or less.userName
String
userNamecan be any character or the user name on your own user system,A utf8 string with a maximum length of 256 bytes or less.
plugins
List< IZegoUIKitPlugin >
Fixed value. Set it to
ZegoUIKitSignalingPluginas shown in the sample.
Please refer to the API reference for complete parameters.
Add a call invitation button
Add the button for making call invitations, and pass in the ID of the user you want to call.
TIPS
You will create a resourceID in the zegocloud console, Please refer to the video tutorial below for details.
See <Firebase Console and ZEGO Console Configuration> and <Apple Developer Center and ZEGOCLOUD Console Configuration>
Props of ZegoSendCallInvitationButton
Property | Type | Description |
|---|---|---|
invitees | List< ZegoUIKitUser > | The information of the callee. userID and userName are required. For example: |
isVideoCall | bool | If true, a video call is made when the button is pressed. Otherwise, a voice call is made. |
resourceID | String? |
See <Firebase Console and ZEGO Console Configuration> and <Apple Developer Center and ZEGOCLOUD Console Configuration> |
Please refer to the API reference for complete parameters.
Configure your project (Android)
Please refer to the following steps to configure your Android project. If you want to experience the functionality before integration, we have provided sample code that includes steps 2 through 6 so you can quickly test it.
- Firebase Console and ZEGO Console Configuration
-
step1. In the Firebase console: Create a project. (Resource may help: Firebase Console)
-
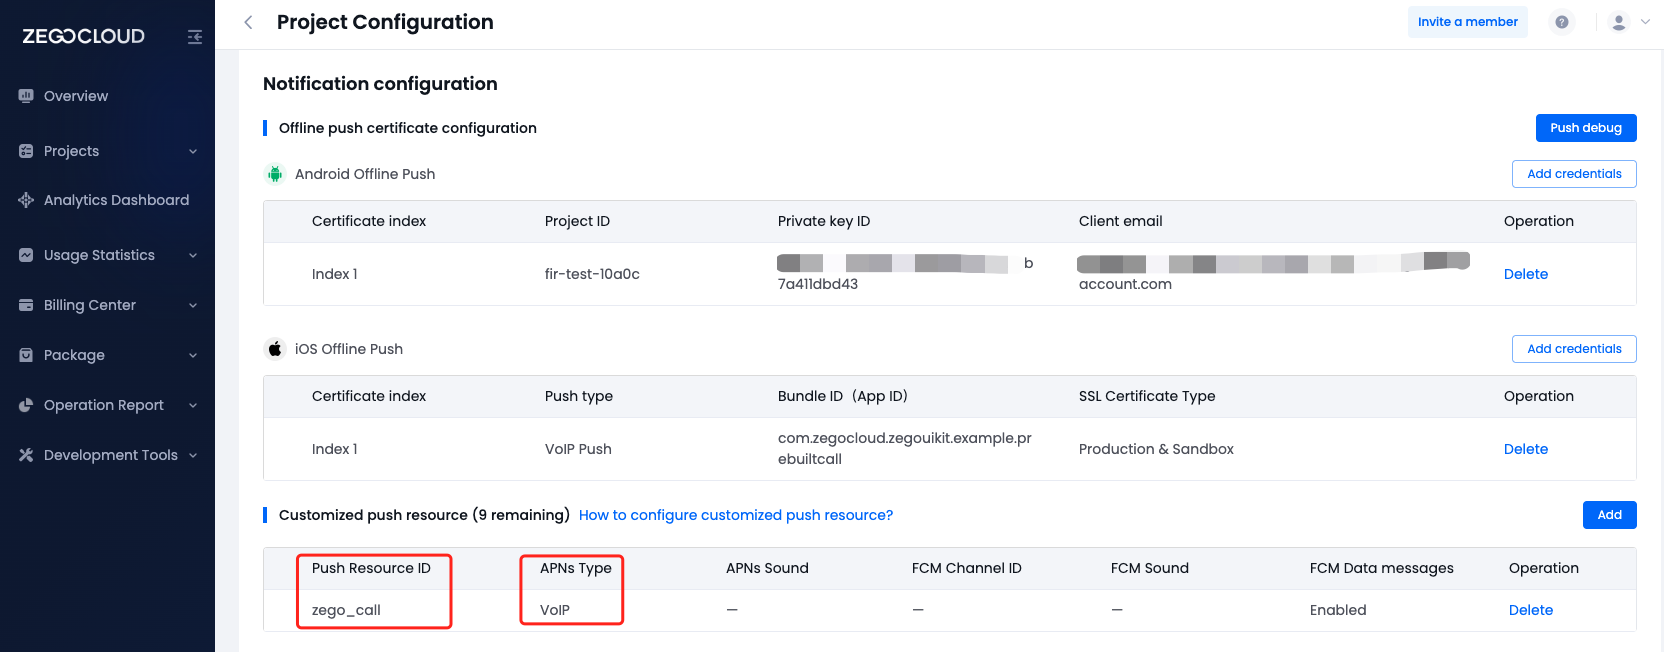
step2. In the ZegoCloud console: Add FCM certificate, create a resource ID;
In the create resource ID popup dialog, you should switch to the VoIP option for APNs, and switch to Data messages for FCM.
When you have completed the configuration, you will obtain the
resourceID. You can refer to the image below for comparison.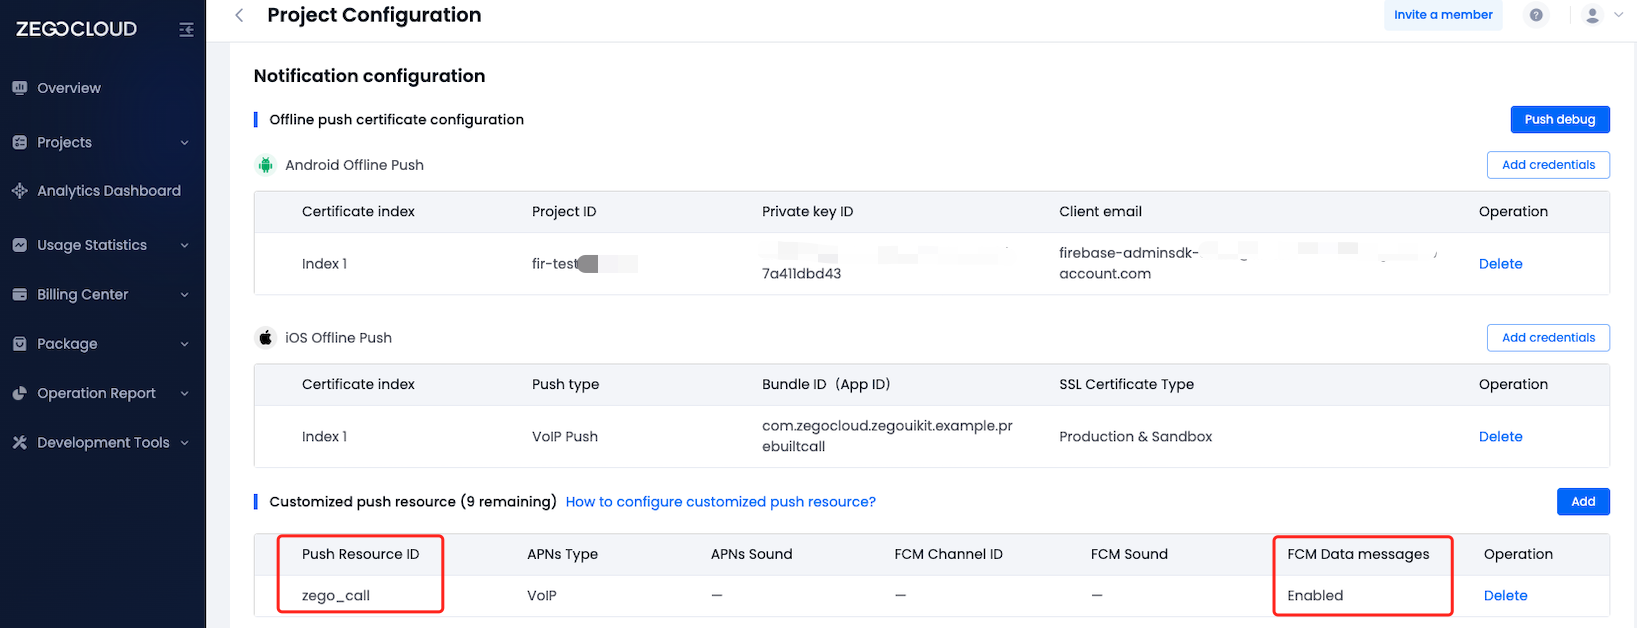
-
step3. In the Firebase console: Create an Android application and modify your code;
- Modify the compileSdkVersion and minSdkVersion
-
step1. Modify the
compileSdkVersionto 33 in theyour_project/android/app/build.gradlefile.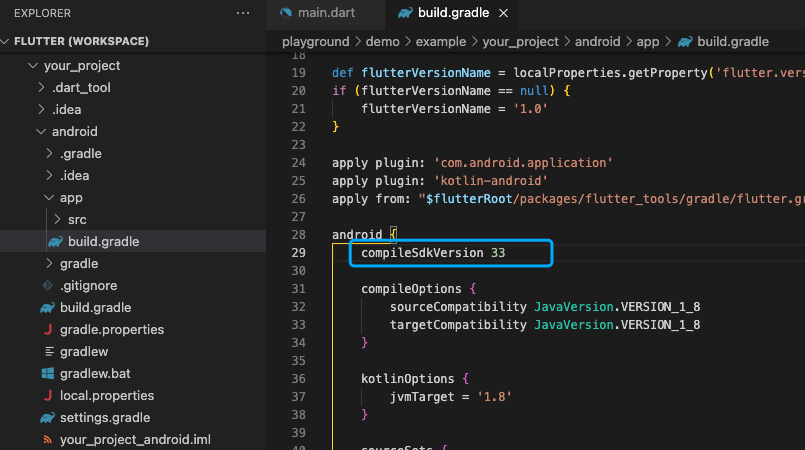
-
step2. Modify the
minSdkVersionin the same file
- Set the Kotlin & Gradle versions
-
step1. Modify the
kotlinversion to >= 1.8.0 and thegradle classpathversion to 7.3.0 in theyour_project/android/app/build.gradlefile: -
step2. Make the
gradleversion >= 7.0: In theyour_project/android/gradle/wrapper/gradle-wrapper.propertiesfile, modify thedistributionUrltohttps://services.gradle.org/distributions/gradle-7.4-all.zip.
- Add firebase-messaging dependency
Add this line to your project's your_project/android/app/build.gradle file as instructed.
- Add app permissions
Open the file your_project/app/src/main/AndroidManifest.xml, and add the following code:
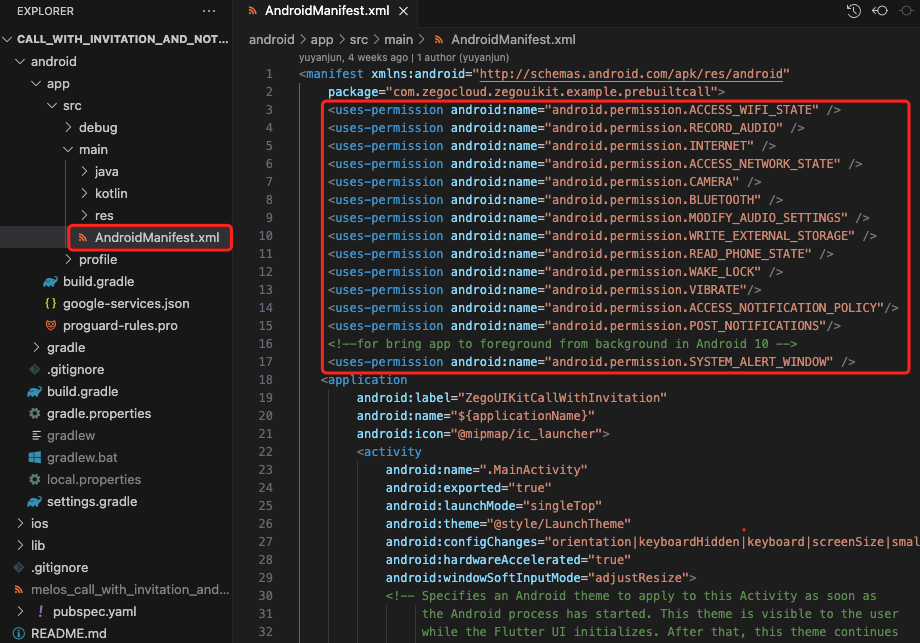
- Prevent code obfuscation
To prevent obfuscation of the SDK public class names, do the following:
-
step1. In your project's
your_project > android > appfolder, create aproguard-rules.profile with the following content as shown below:TIPS
Please copy the following content directly instead of typing it manually
-
step2. Add the following config code to the
releasepart of theyour_project/android/app/build.gradlefile.
- Check whether the local config is set up properly
Download the zego_check_android_offline_notification.py to your project's root directory, and run the following command:
You will see the following if everything goes well:
- Guide your users to set app permissions (Android only)
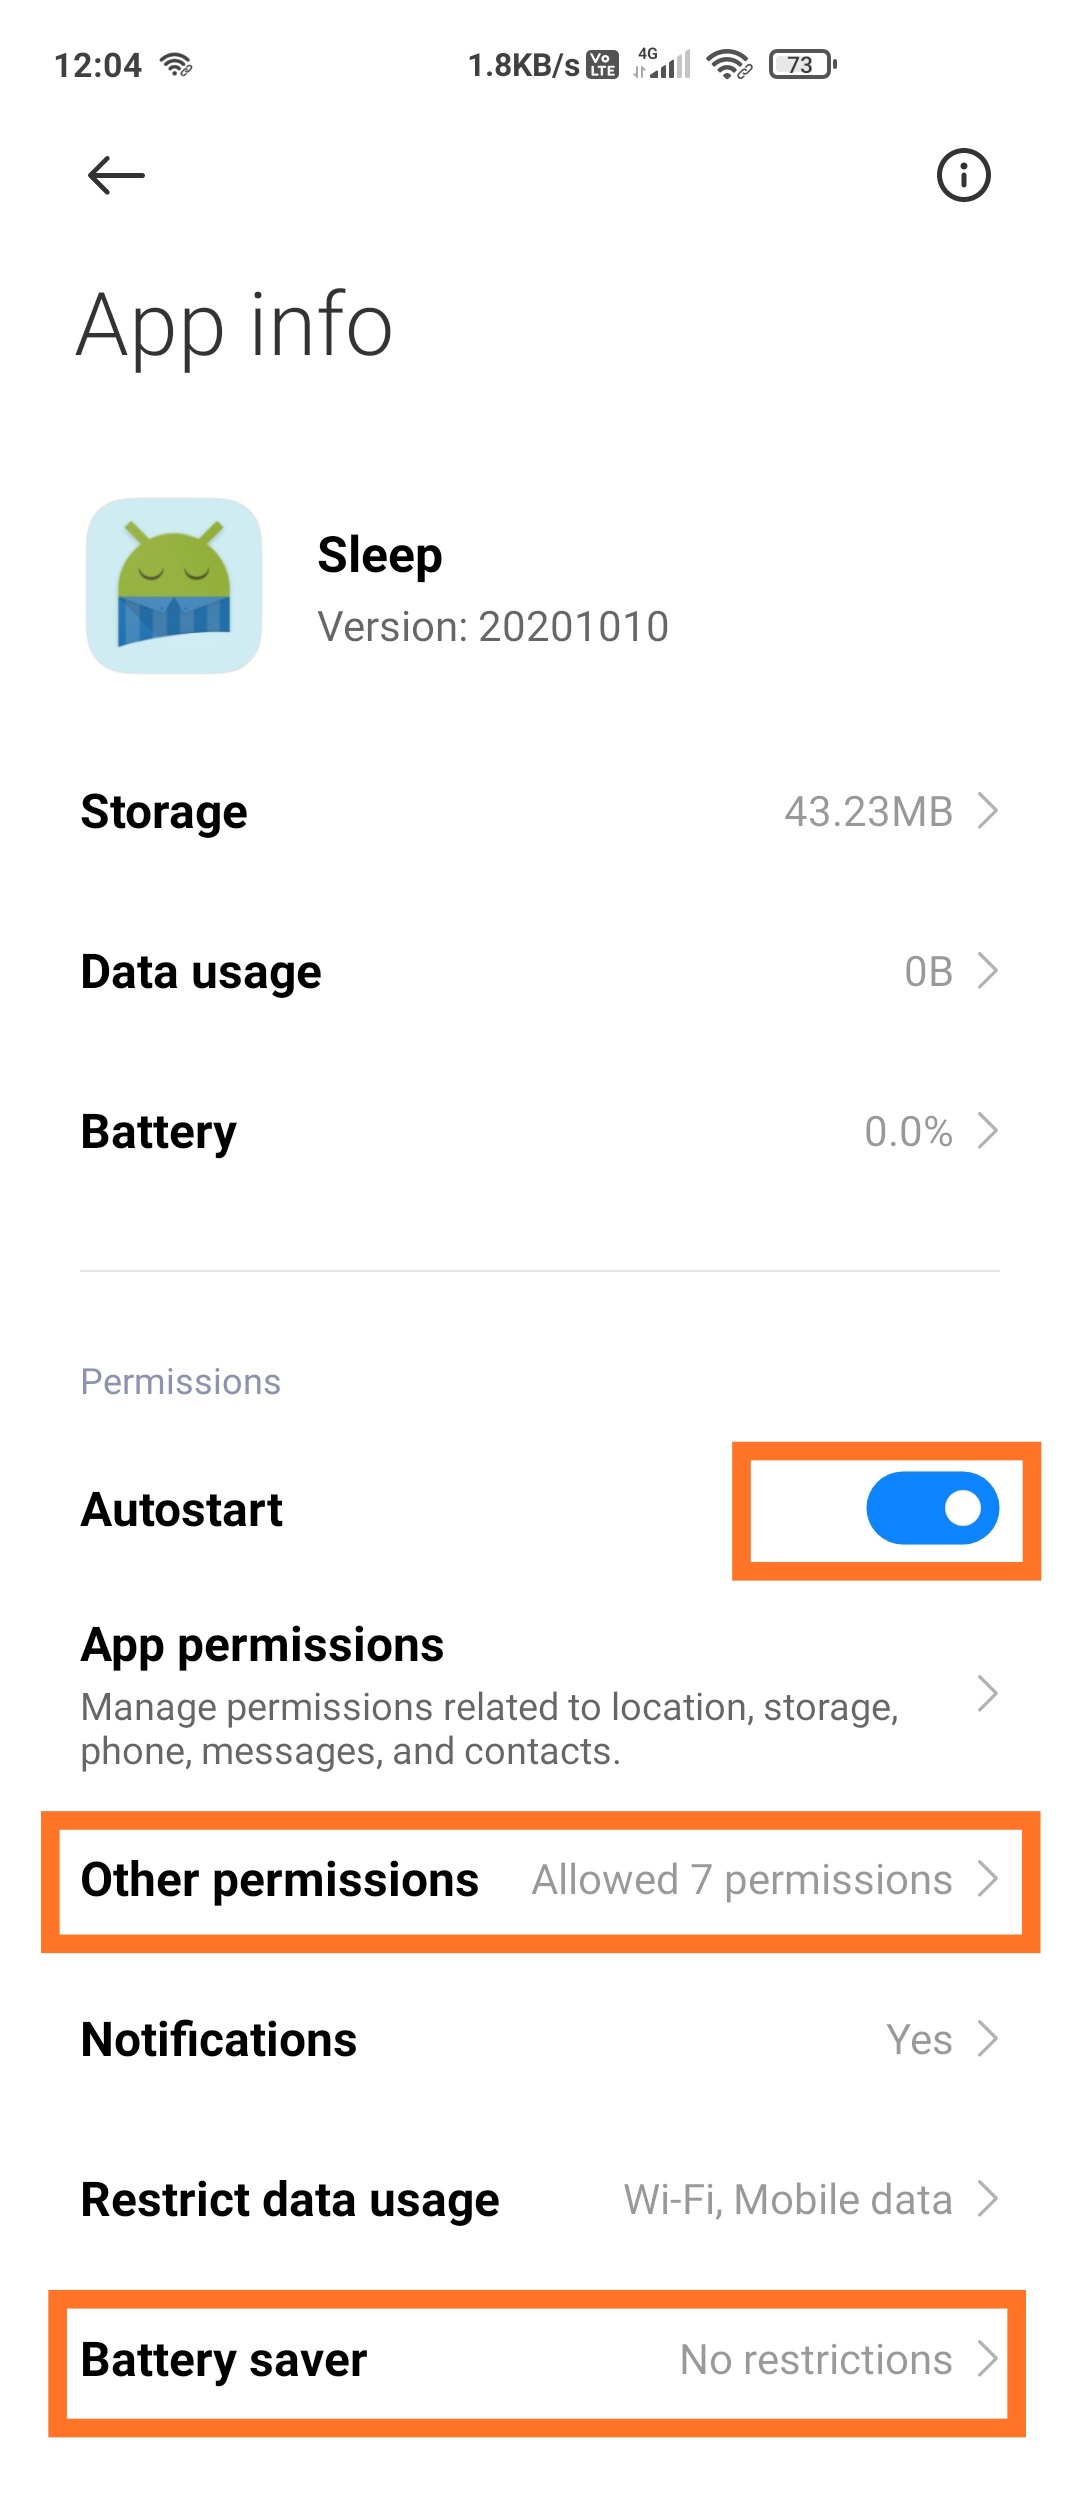
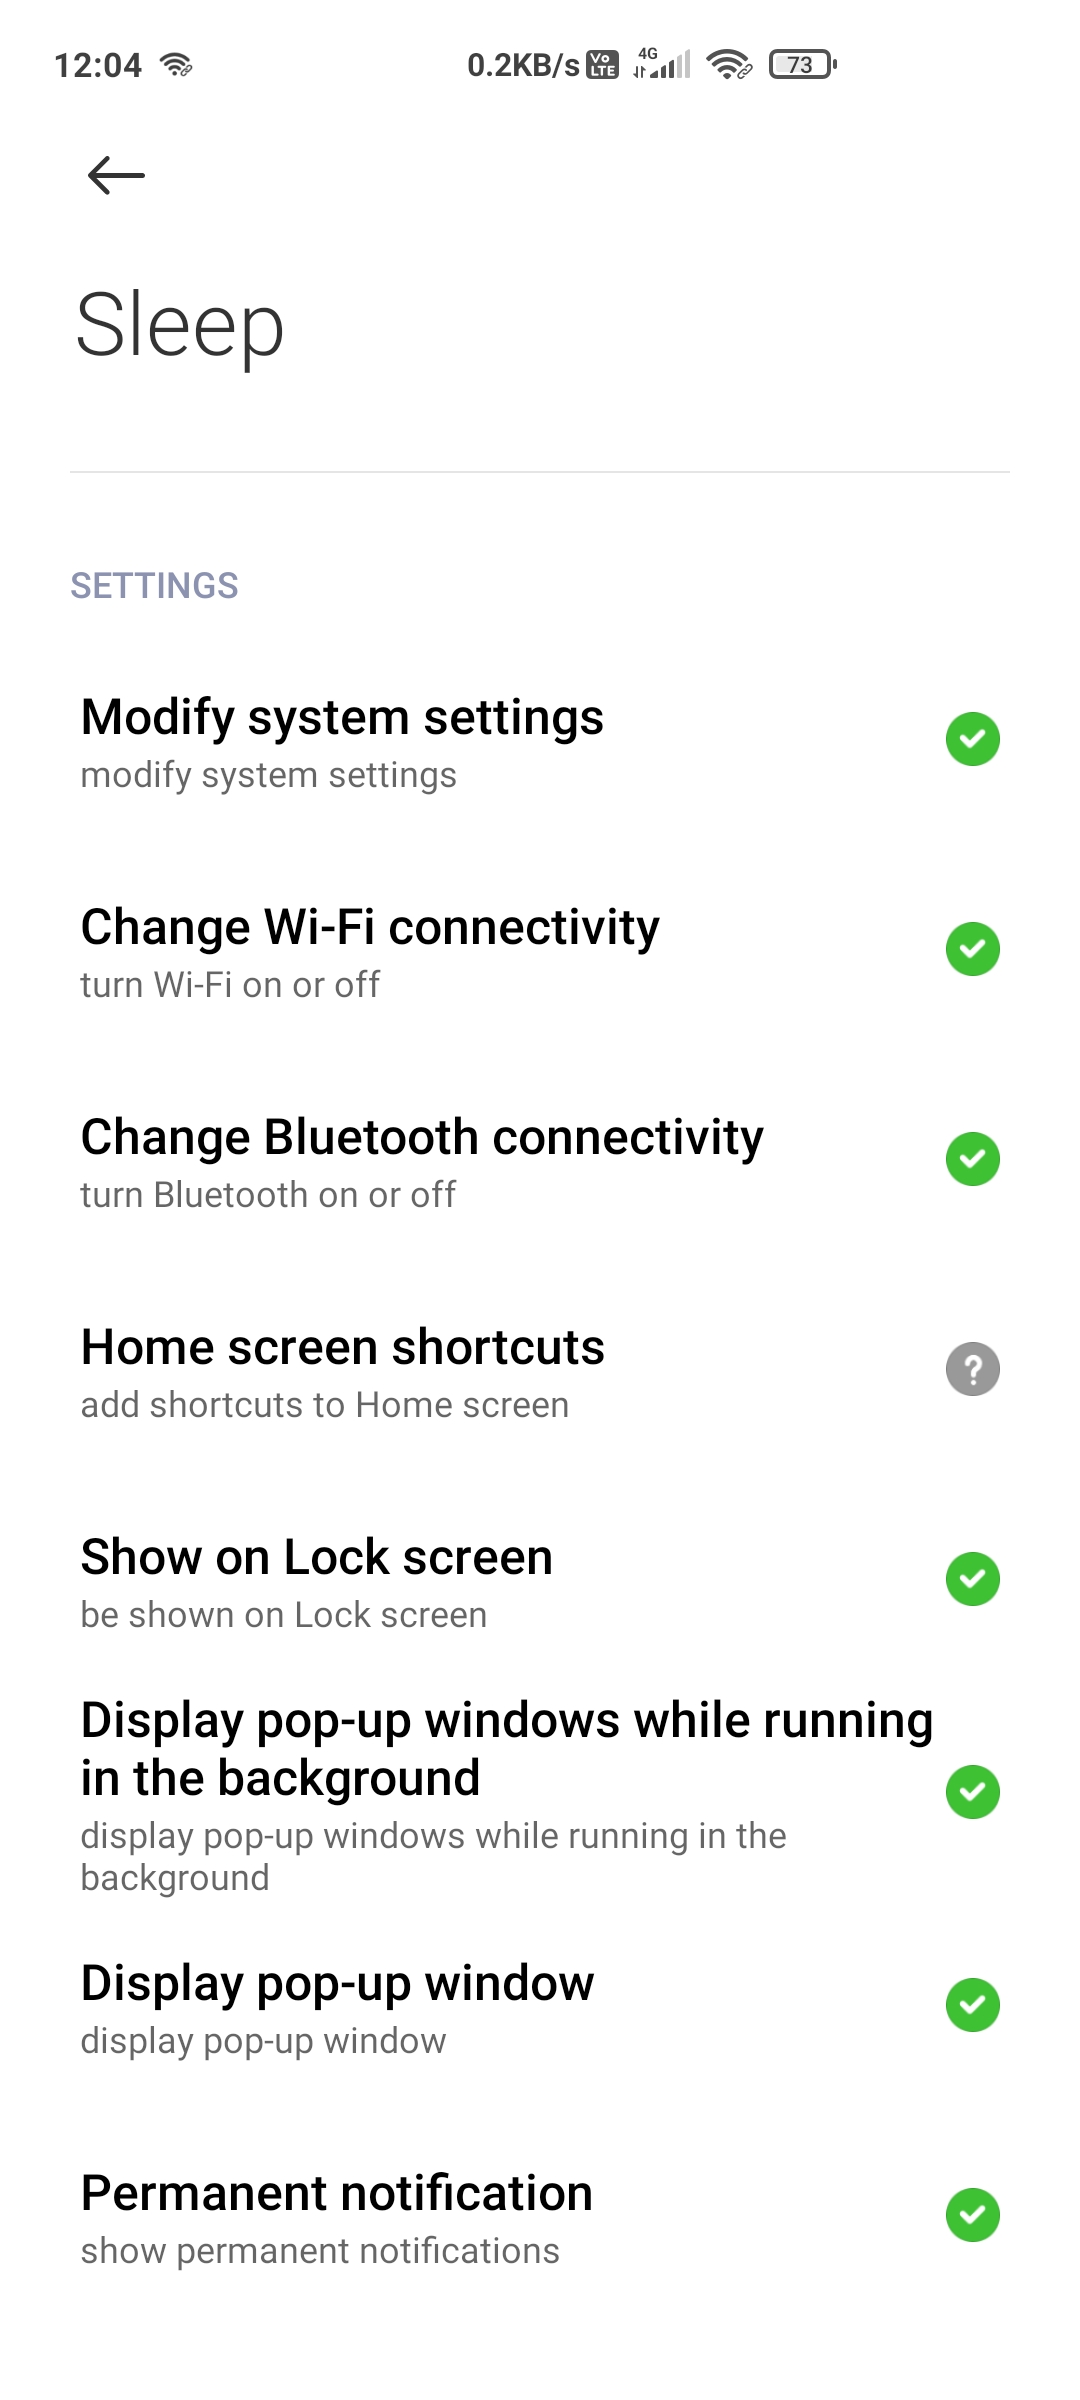
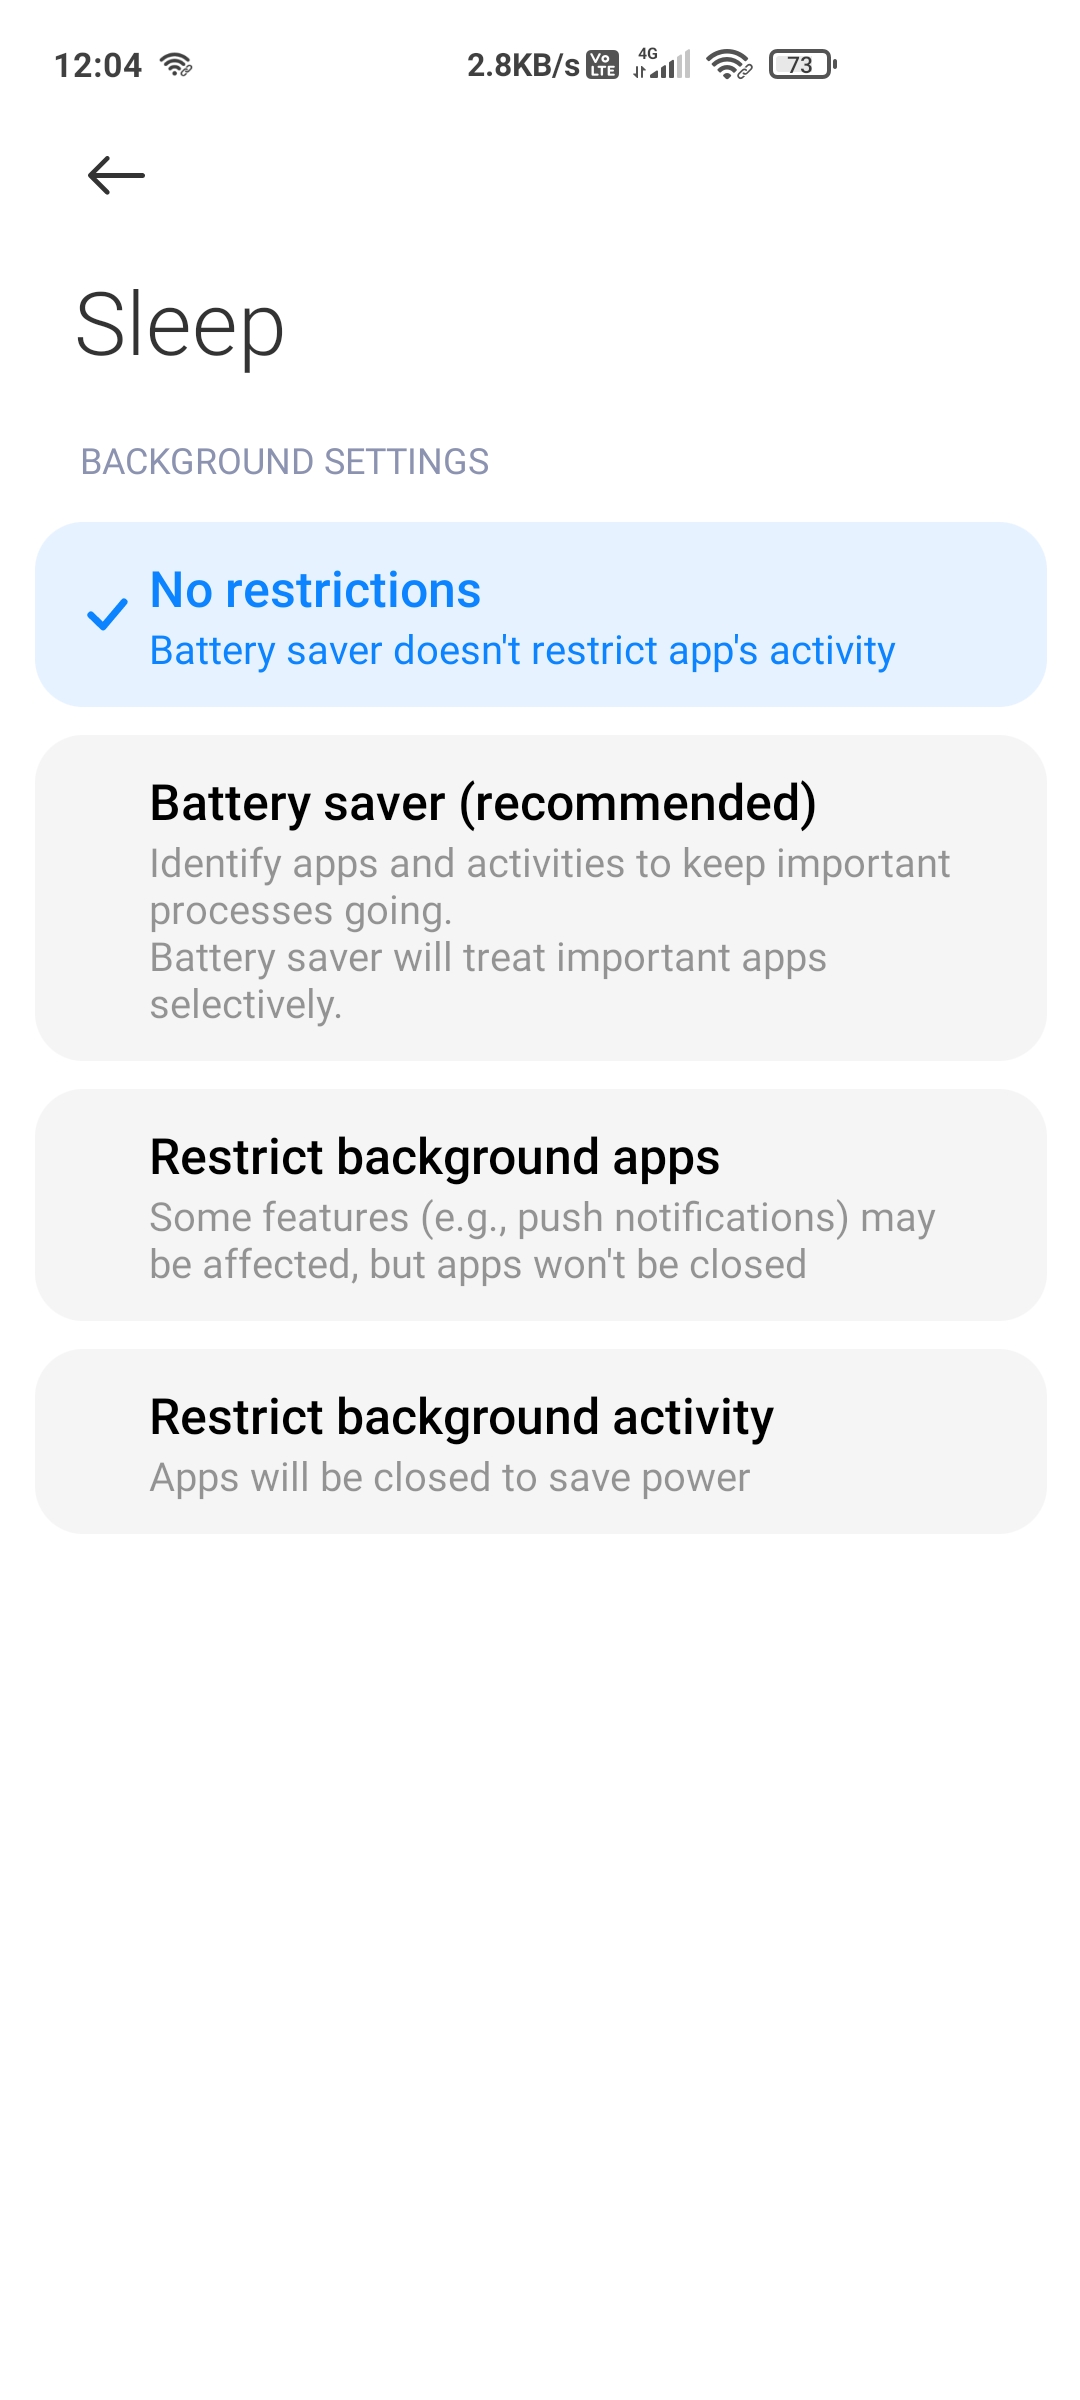
Some devices require special permissions to be enabled in order for your app to automatically display in the foreground when receiving a phone call (such as Xiaomi). Therefore, you need to guide your app users to enable the necessary app permissions to make the system-calling UI effective.
Here are the permissions that an app needs on Xiaomi devices for reference:
-
Show on locked screen: Switch to Enable
-
Display pop-up windows while running in the background: Switch to Enable
-
Display pop-up window: Switch to Enable
 |  |  |
Due to the complexity of Android models and systems, regarding how to set app permissions, you can refer to this article.
- Run & Test
Now you have finished all the Android steps!
You can simply click the Run or Debug to run and test your App on your device.
WARNING
Please use real device testing, as the simulator does not support offline call invitation.

Configure your project (iOS)
Please refer to the following steps to configure your iOS project. If you want to experience the functionality before integration, we have provided sample code that includes steps 2 through 6 so you can quickly test it.
- Apple Developer Center and ZEGOCLOUD Console Configuration
-
step1. You need to refer to Create VoIP services certificates to create the VoIP service certificate, and export a .p12 file on your Mac.
-
step2. Add the voip service certificate .p12 file. Then, create a resource ID;
In the create resource ID popup dialog, you should switch to the VoIP option for APNs, and switch to Data messages for FCM.
When you have completed the configuration, you will obtain the resourceID. You can refer to the image below for comparison.
- Add app permissions
-
step1. Open the
your_project/ios/Podfilefile, and add the following to thepost_install do |installer|part: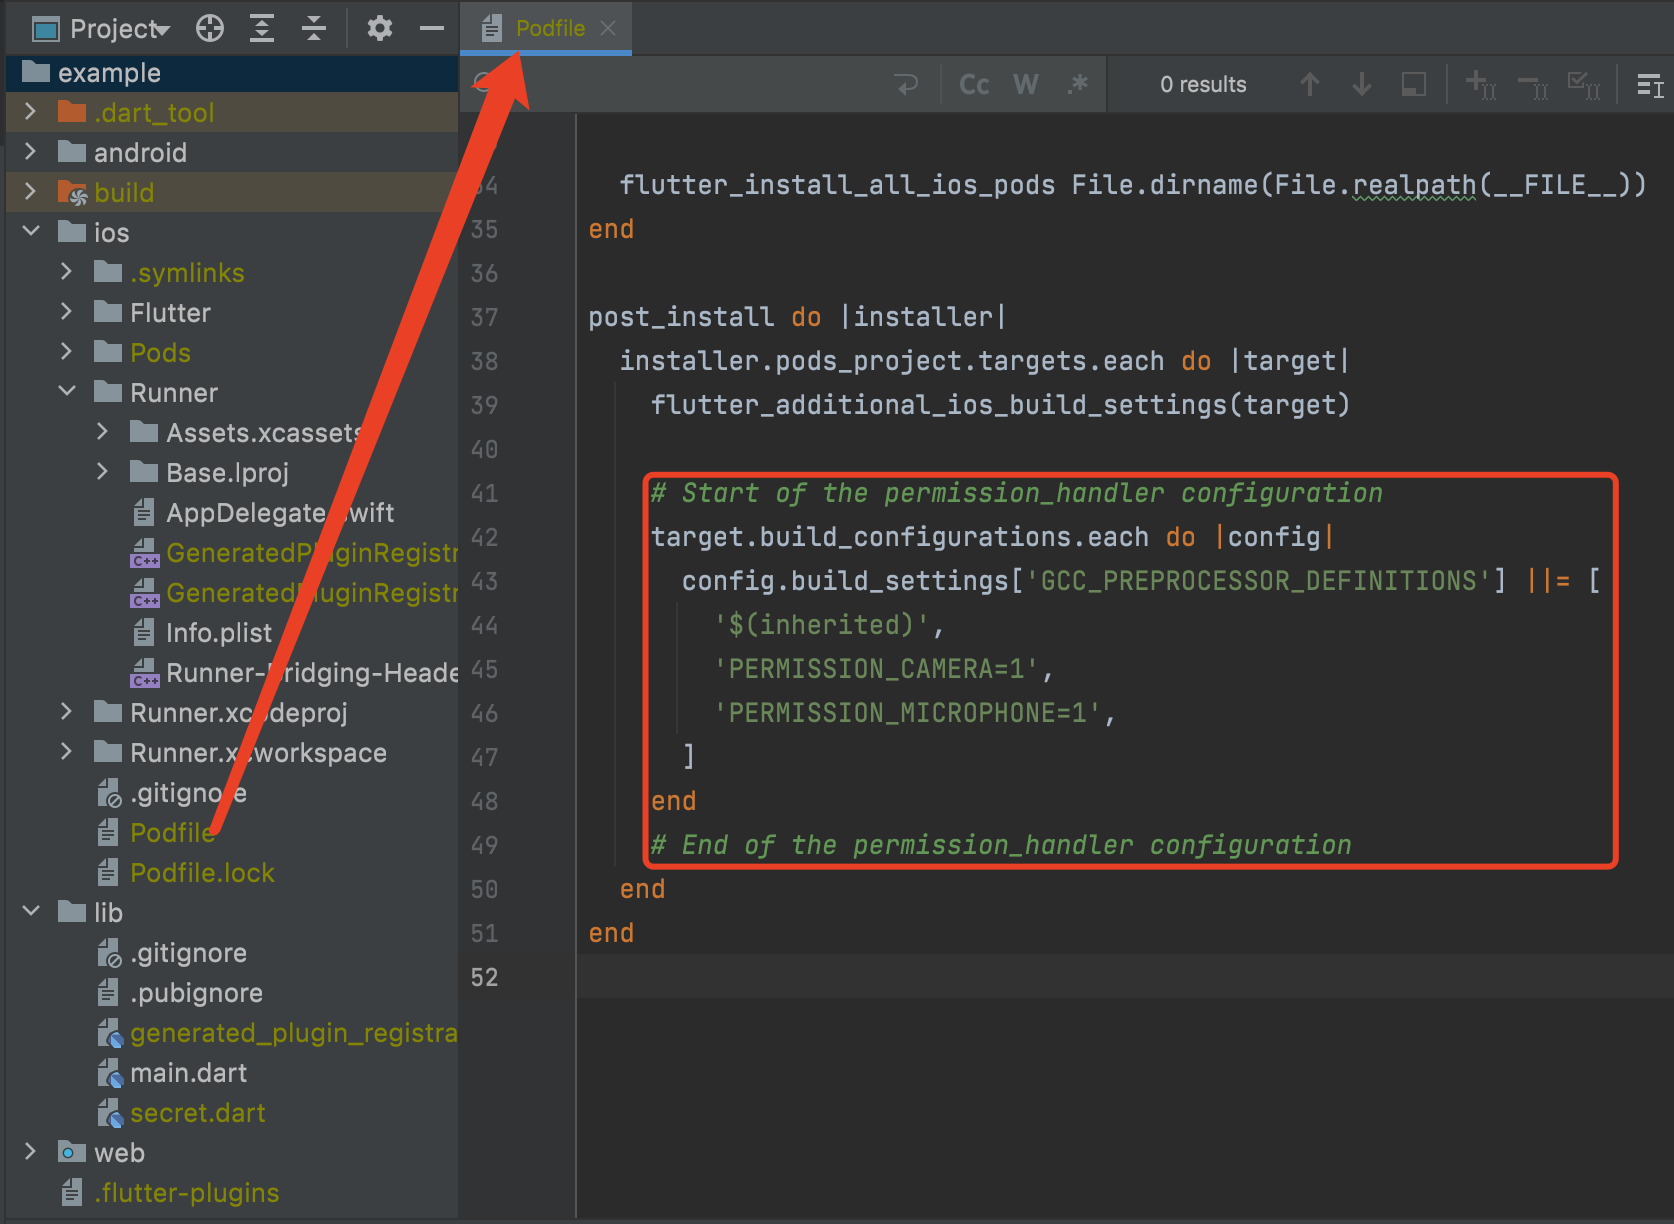
-
step2. Open the
your_project/ios/Runner/Info.plistfile, and add the following to thedictpart:

- Disable the Bitcode
TIPS
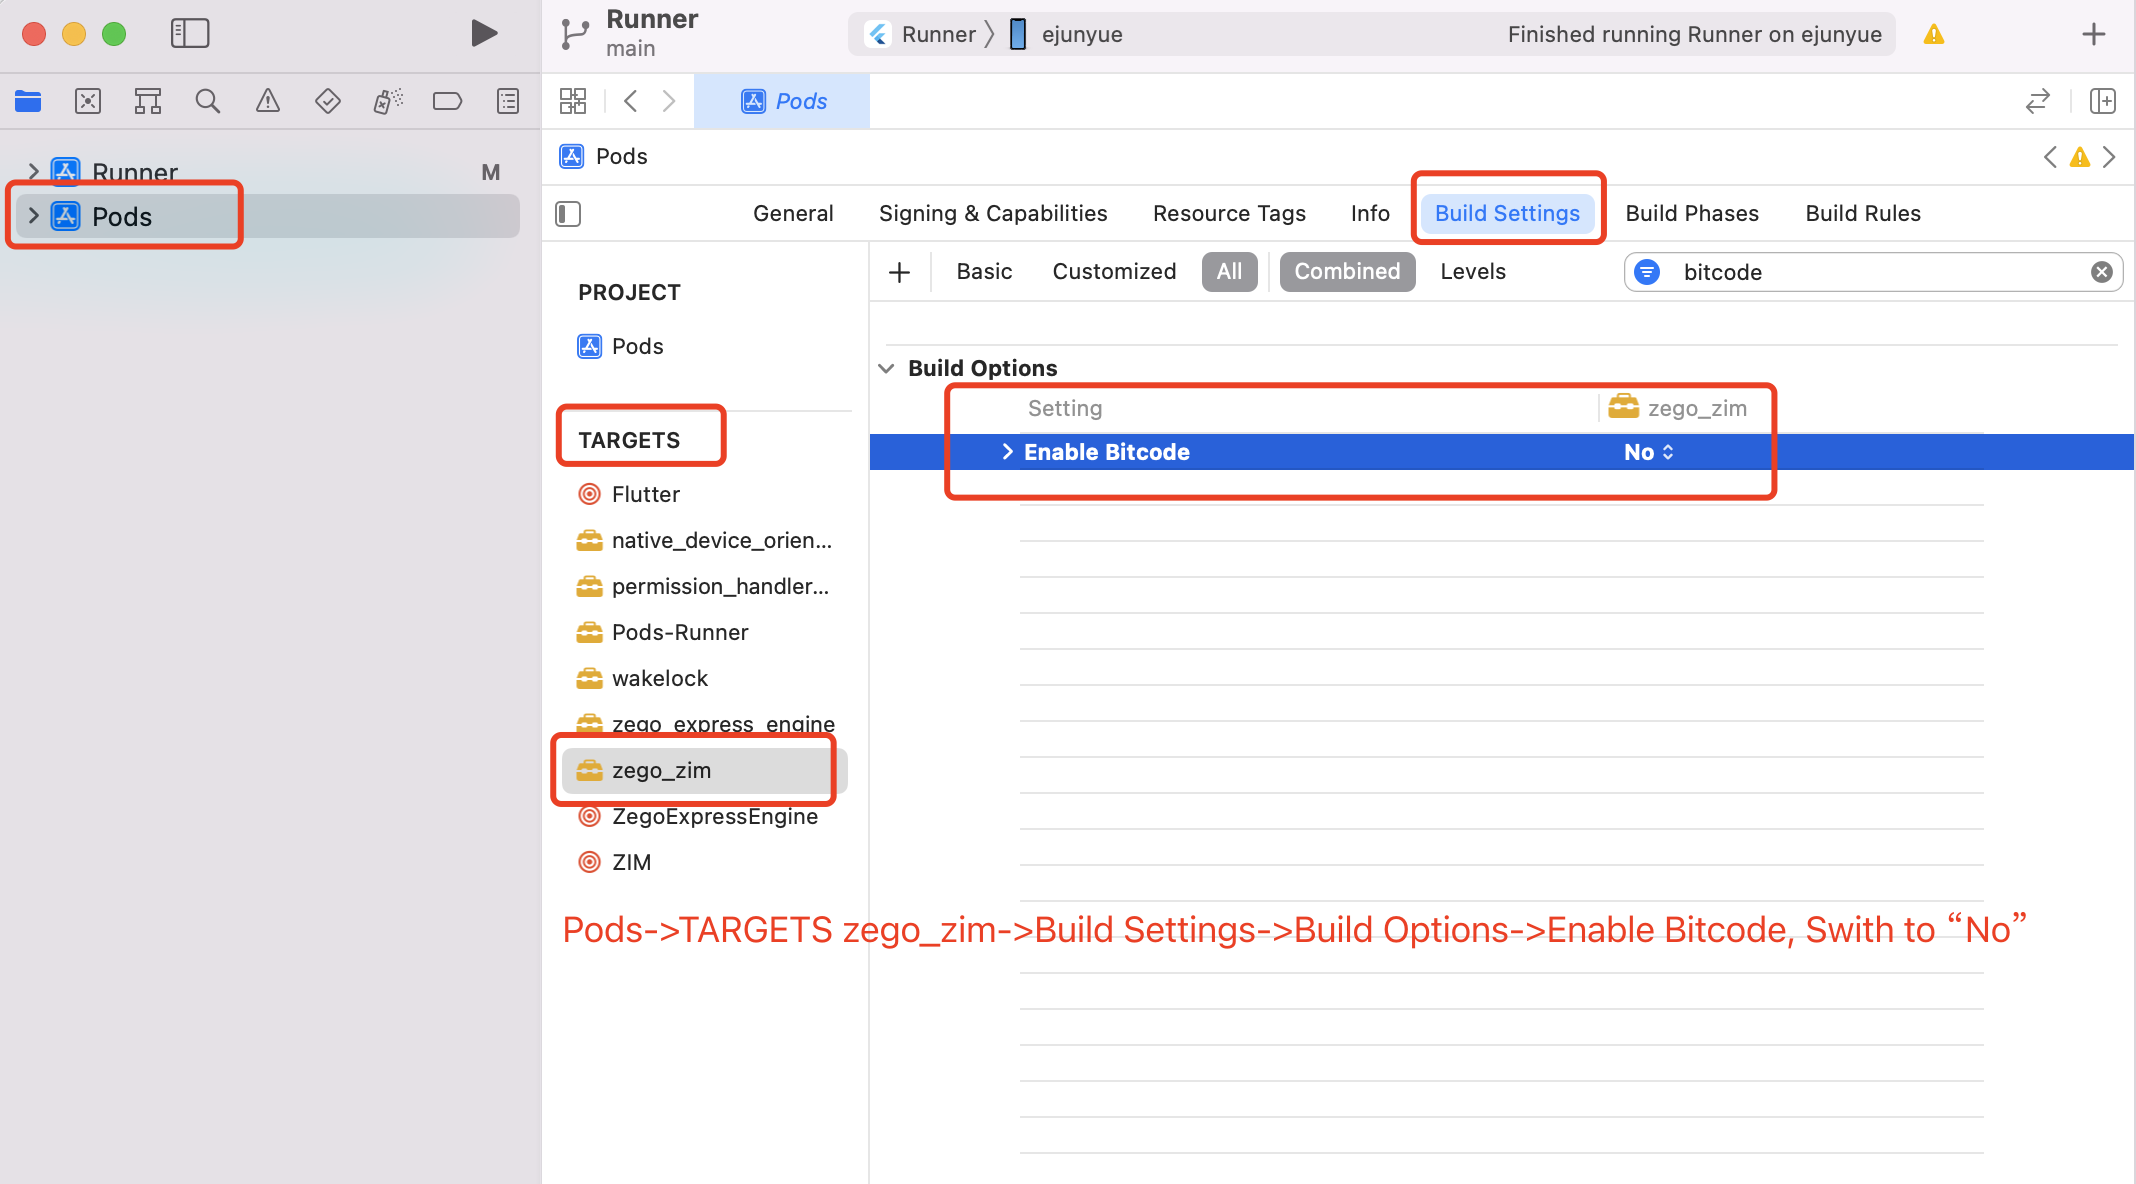
The following SDKs need to have Bitcode disabled:
-
zego_zim
-
zego_zpns
-
zego_express_engine
-
step1. Open the
your_project > iOS > Runner.xcworkspacefile. -
step2. Select your target project, and follow the notes on the following two images to disable the Bitcode respectively.

- Disable Build Libraries for Distribution
Open the your_project > iOS > Runner.xcworkspace file. Select your target project, and follow the notes on the following image to disable the Build Libraries for Distribution.

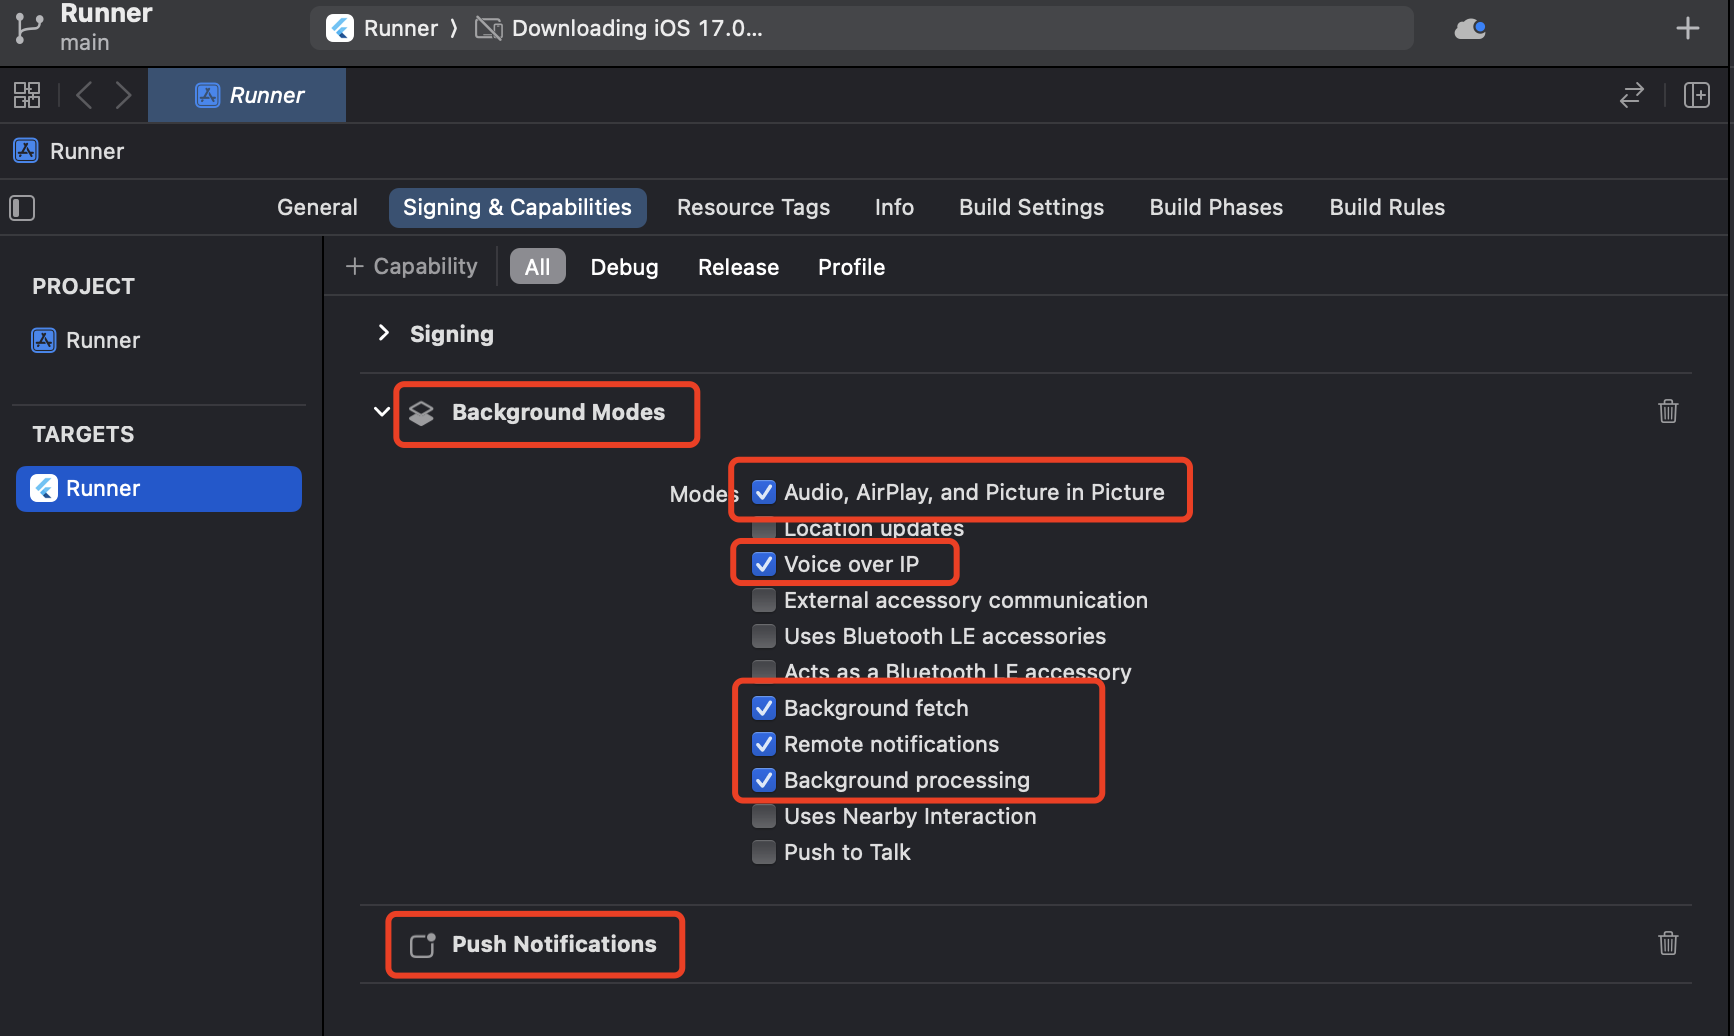
- Add Push Notifications configuration
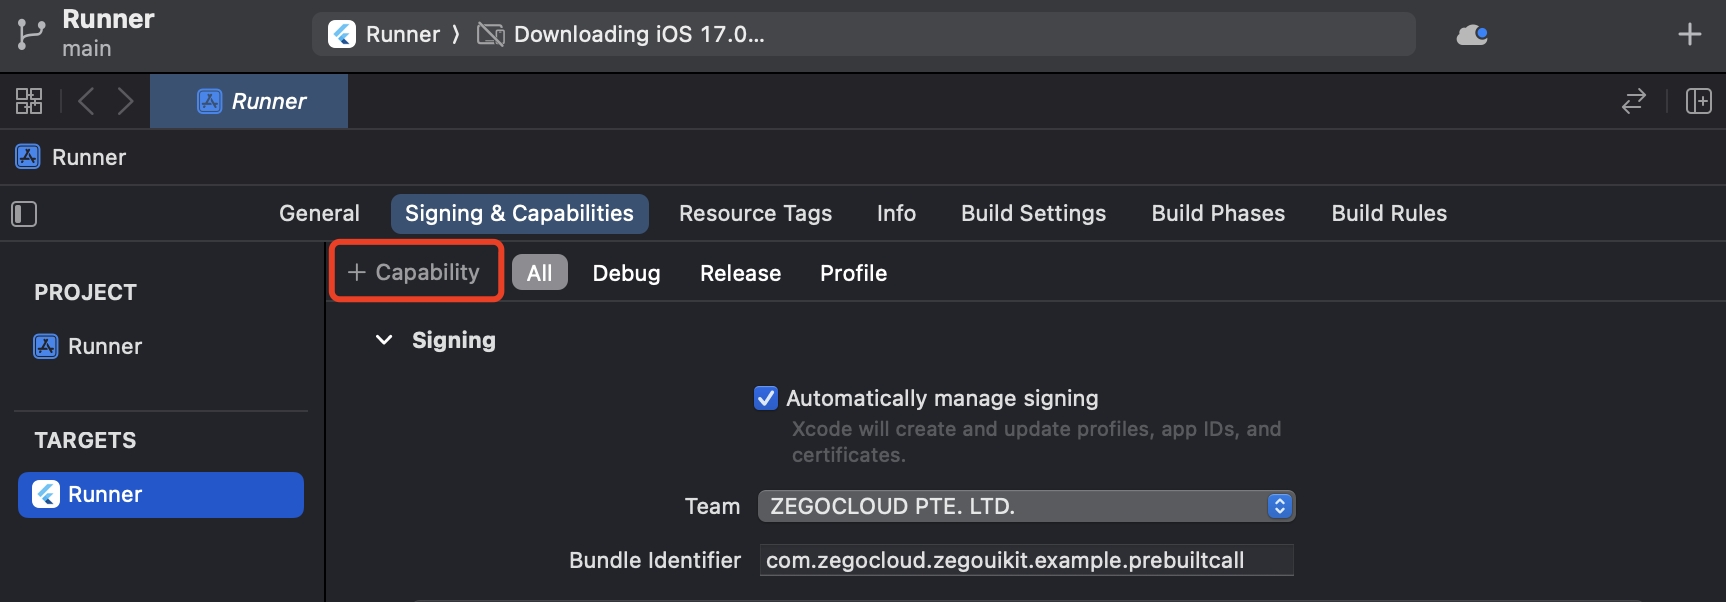
Open the project with Xcode, and click the+ Capability on the Signing & Capabilities page.
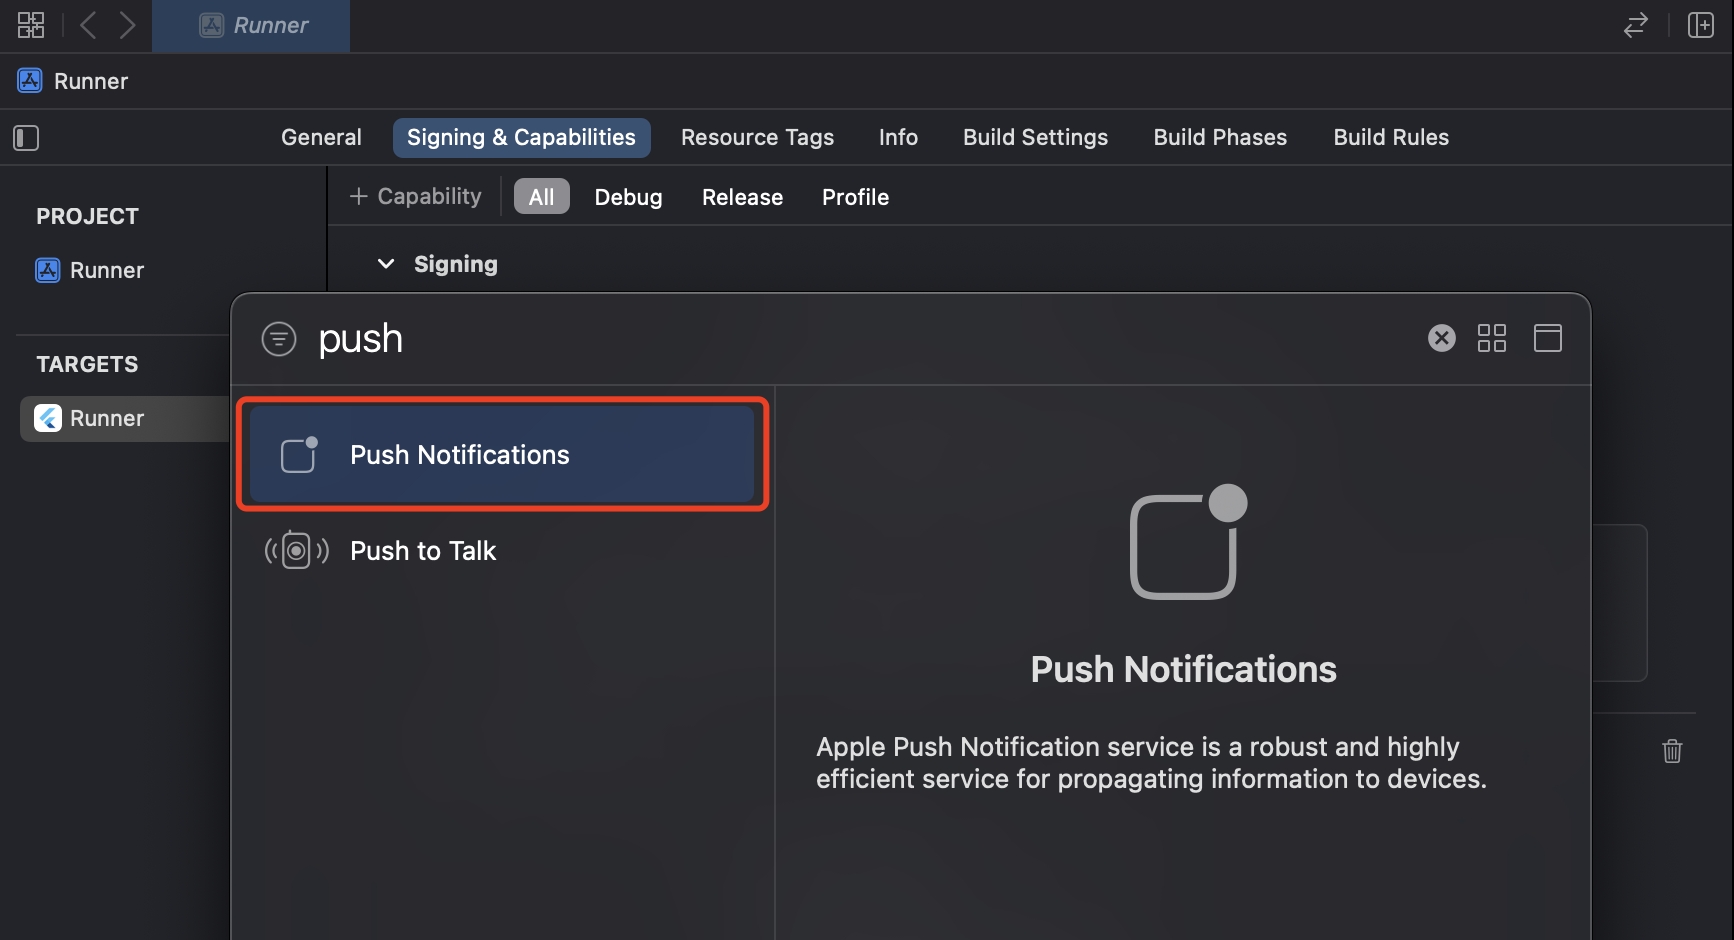
Double-click on Push Notifications to add this feature.
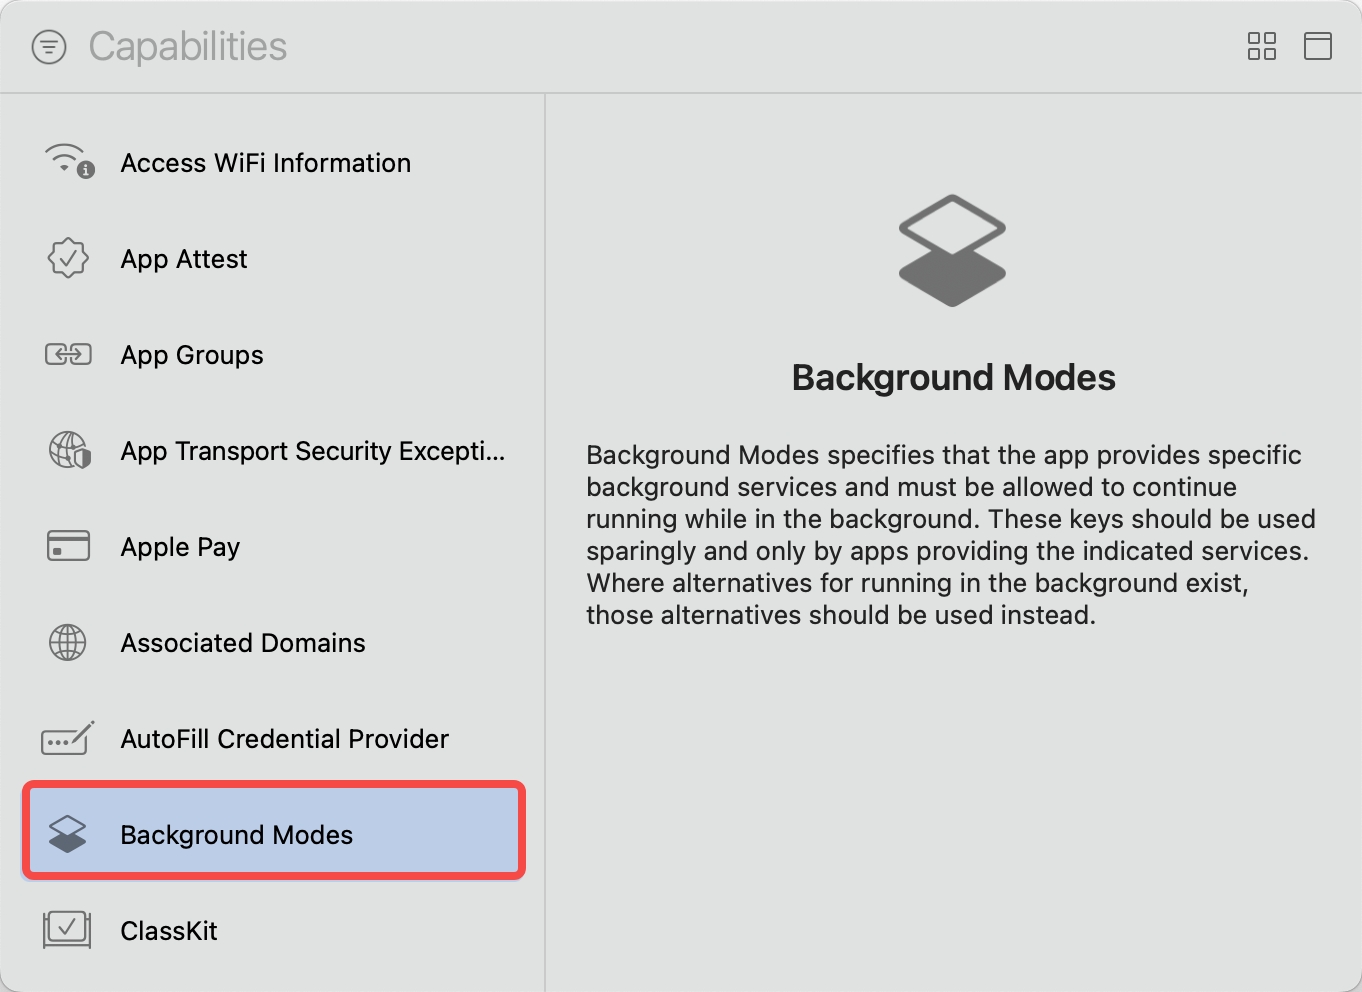
- Add the Background Modes capability
Open the project with Xcode, and click the+ Capability on the Signing & Capabilities page again.

And double-click on Background Modes in the pop-up window. This will allow you to see the Background Modes configuration in the Signing & Capabilities.
- Check and Make sure the following features are enabled
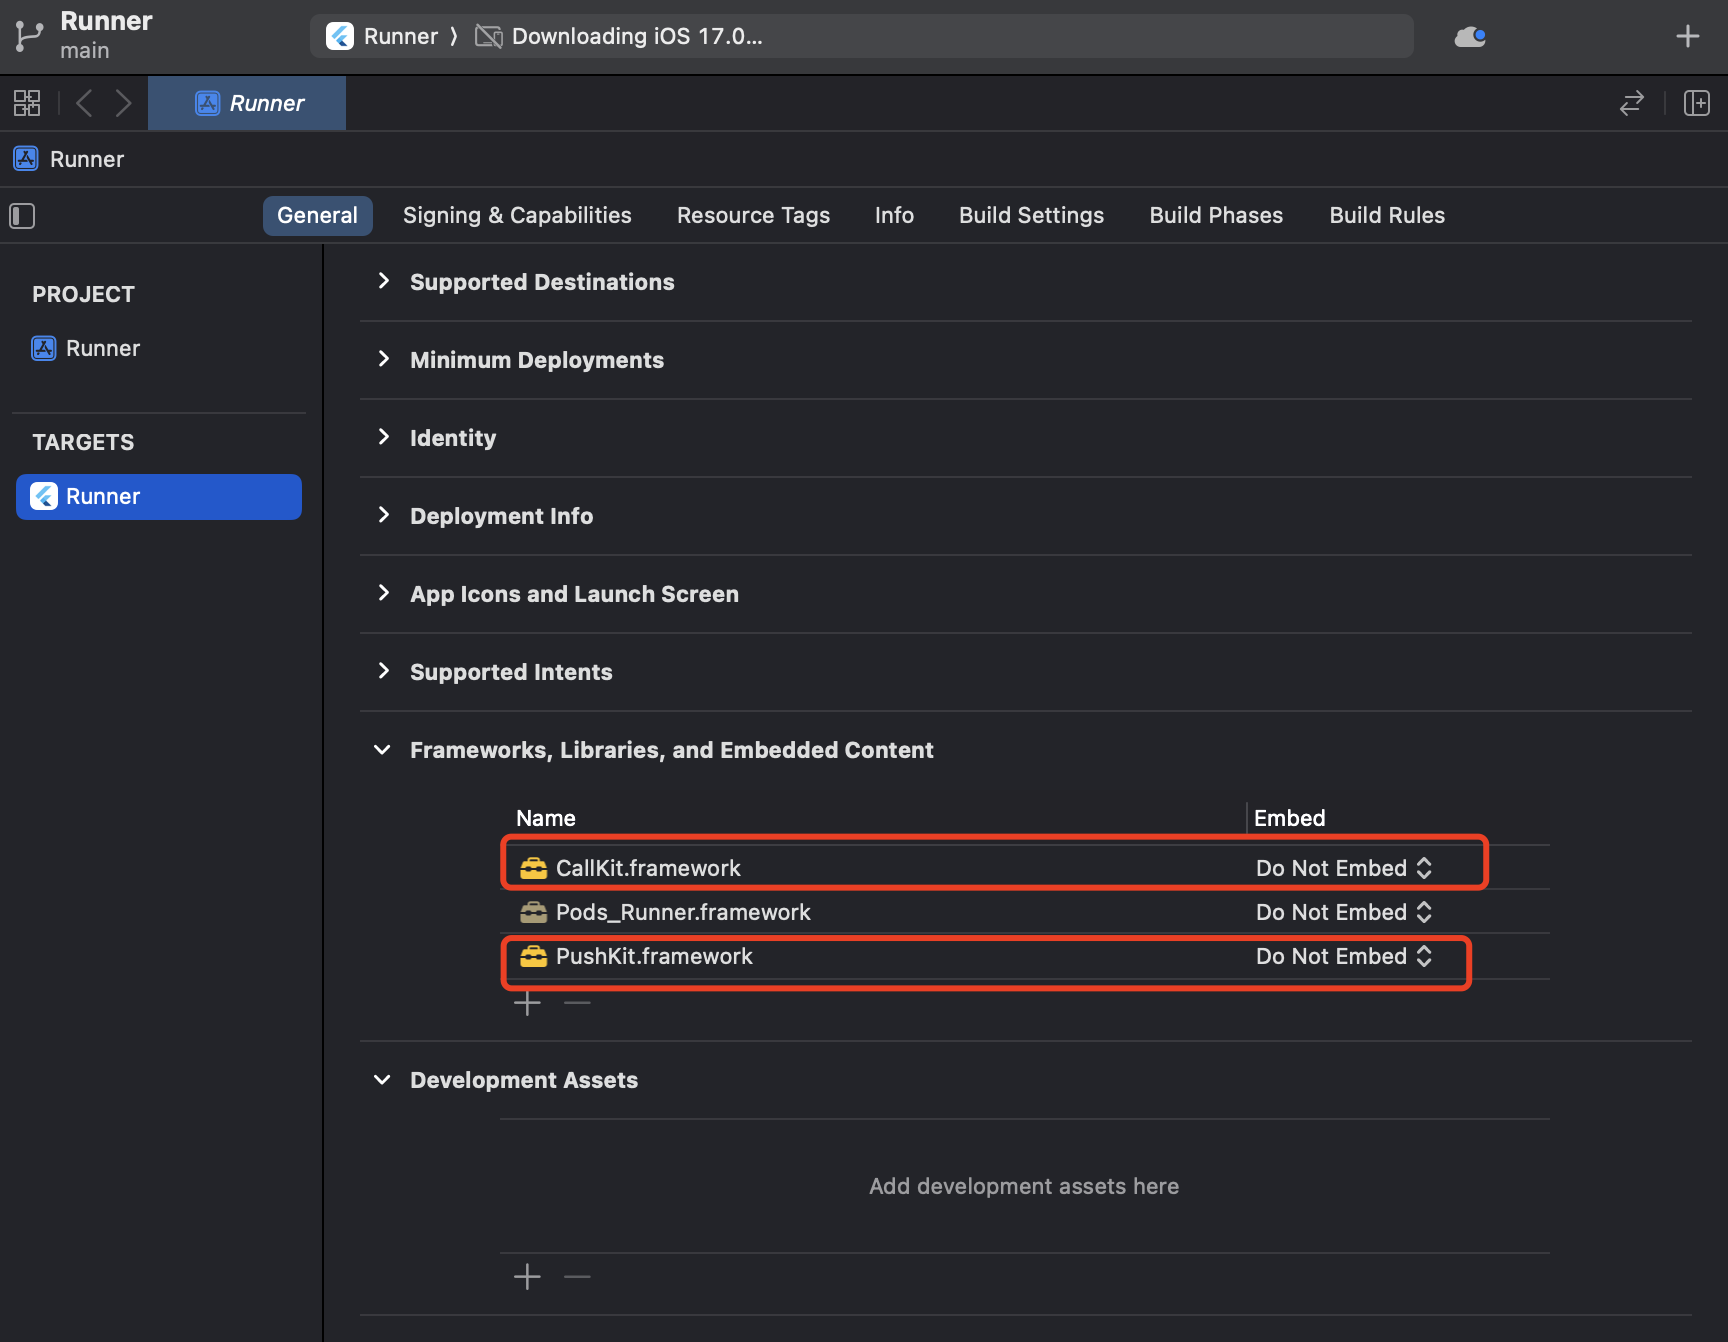
- Import the PushKit and CallKit libraries
- Run & Test
Now you have finished all the steps!
You can simply click the Run or Debug to run and test your App on your device.
WARNING
Please use real device testing, as the simulator does not support offline call invitation.

Related guide and resources
-
Click here to get the complete sample code: Sample code
-
Click here for detailed explanations of all APIs: API reference
